
Discover how to leverage the power of kcli and libvirt to rapidly deploy a full OpenShift cluster in under 30 minutes, cutting through the complexity often associated with OpenShift installations.
Prerequisites
Server with 8+ cores, minimum of 64GB RAM (96+ for >1 worker node)
Fast IO
– dedicated NVMe libvirt storage or
– NVMe LVMCache fronting HDD (surprisingly effective!)
OS installed (tested with CentOS Stream 8)
Packages libvirt + git installed
Pull-secret (store in openshift_pull.json) obtained from https://cloud.redhat.com/openshift/install/pull-secret
Install kcli
[steve@shift ~]$ git clone https://github.com/karmab/kcli.git
[steve@shift ~]$ cd kcli; ./install.sh
Configure parameters.yml
(see https://kcli.readthedocs.io/en/latest/#deploying-kubernetes-openshift-clusters)
example:-
[steve@shift ~]$ cat parameters.yml
cluster: shift413
domain: shift.local
version: stable
tag: '4.13'
ctlplanes: 3
workers:3
ctlplane_memory:16384
worker_memory:16384
ctlplane_numcpus: 8
worker_numcpus: 4
Note 1: To deploy Single Node Openshift (SNO) set ctlplanes to 1 and workers to 0.
Note 2: Even a fast Xeon with NVMe storage may have difficulty deploying more than 3 workers before the installer times out.
An RFE exists to make the timeout configurable, see:
https://access.redhat.com/solutions/6379571
https://issues.redhat.com/browse/RFE-2512
Deploy cluster
[steve@shift ~]$ kcli create kube openshift --paramfile parameters.yml $cluster
Note: openshift_pull.json and parameters.yml should be in your current working directory, or adjust above as required
Monitor Progress
If you wish to monitor progress, find IP of bootsrap node:-
[steve@shift ~]$ virsh net-dhcp-leases default
 Expiry Time           MAC address         Protocol   IP address           Hostname            Client ID or DUID
---------------------------------------------------------------------------------------------------------------------
 2023-07-19 15:48:02   52:54:00:08:41:71   ipv4       192.168.122.103/24   ocp413-ctlplane-0   01:52:54:00:08:41:71
 2023-07-19 15:48:02   52:54:00:10:2a:9d   ipv4       192.168.122.100/24   ocp413-ctlplane-1   01:52:54:00:10:2a:9d
 2023-07-19 15:46:30   52:54:00:2b:98:2a   ipv4       192.168.122.211/24   ocp413-bootstrap    01:52:54:00:2b:98:2a
 2023-07-19 15:48:03   52:54:00:aa:d7:02   ipv4       192.168.122.48/24    ocp413-ctlplane-2   01:52:54:00:aa:d7:02
then ssh to bootstrap node as core user and follow instructions:-
[steve@shift ~]# ssh core@192.168.122.231
journalctl -b -f -u release-image.service -u bootkube.service
Once cluster is deployed you'll receive the following message:-

INFO Waiting up to 40m0s (until 3:42PM) for the cluster at https://api.ocp413.lab.local:6443 to initialize...
INFO Checking to see if there is a route at openshift-console/console...
INFO Install complete!
INFO To access the cluster as the system:admin user when using 'oc', run 'export KUBECONFIG=/root/.kcli/clusters/ocp413/auth/kubeconfig'
INFO Access the OpenShift web-console here: https://console-openshift-console.apps.ocp413.lab.local
INFO Login to the console with user: "kubeadmin", and password: "qTT5W-F5Cjz-BIPx2-KWXQx"
INFO Time elapsed: 16m18s
Deleting ocp413-bootstrap
Note: Whilst the above credentials can be found later, it’s worthwhile making a note of the above. I save to a text file on the host.
Confirm Status
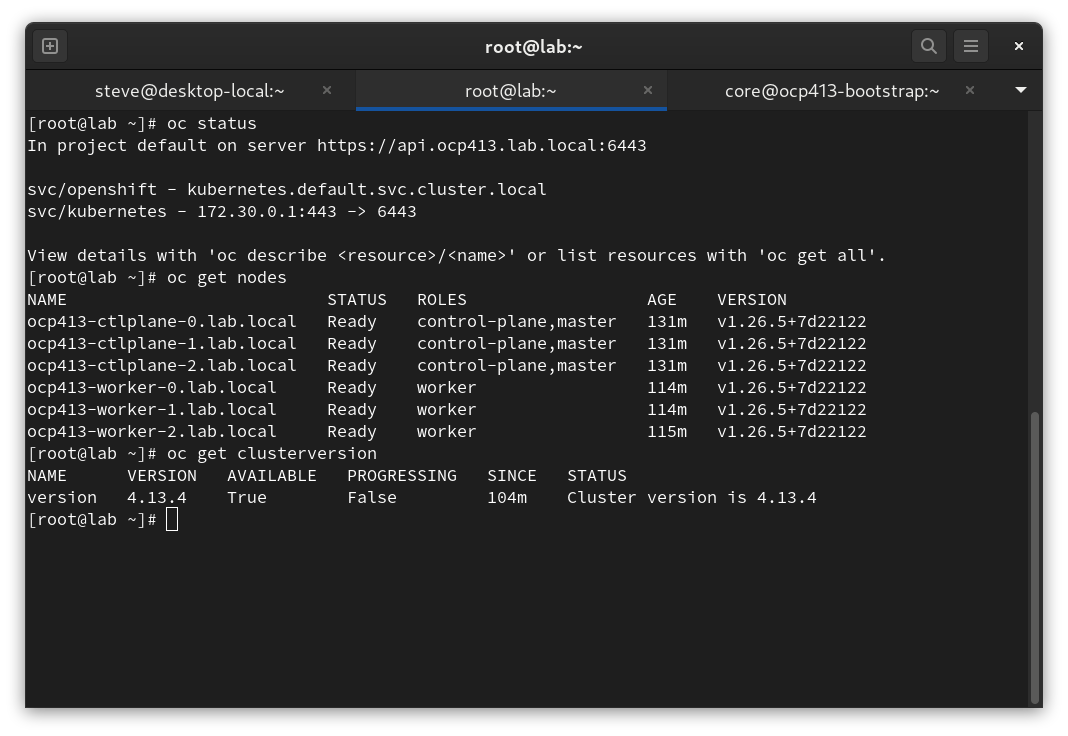
[root@shift ~]# export KUBECONFIG=/root/.kcli/clusters/ocp413/auth/kubeconfig
[root@lab ~]# oc status
In project default on server https://api.ocp413.lab.local:6443
svc/openshift - kubernetes.default.svc.cluster.local
svc/kubernetes - 172.30.0.1:443 -> 6443
View details with 'oc describe <resource>/<name>' or list resources with 'oc get all'.
[root@shift ~]# oc get nodes
NAME                          STATUS   ROLES                  AGE   VERSION
ocp413-ctlplane-0.lab.local   Ready    control-plane,master   68m   v1.26.5+7d22122
ocp413-ctlplane-1.lab.local   Ready    control-plane,master   68m   v1.26.5+7d22122
ocp413-ctlplane-2.lab.local   Ready    control-plane,master   68m   v1.26.5+7d22122
ocp413-worker-0.lab.local     Ready    worker                 51m   v1.26.5+7d22122
ocp413-worker-1.lab.local     Ready    worker                 51m   v1.26.5+7d22122
ocp413-worker-2.lab.local     Ready    worker                 52m   v1.26.5+7d22122
[root@shift ~]# oc get clusterversion
NAME      VERSION   AVAILABLE   PROGRESSING   SINCE   STATUS
version   4.13.4    True        False         42m     Cluster version is 4.13.4
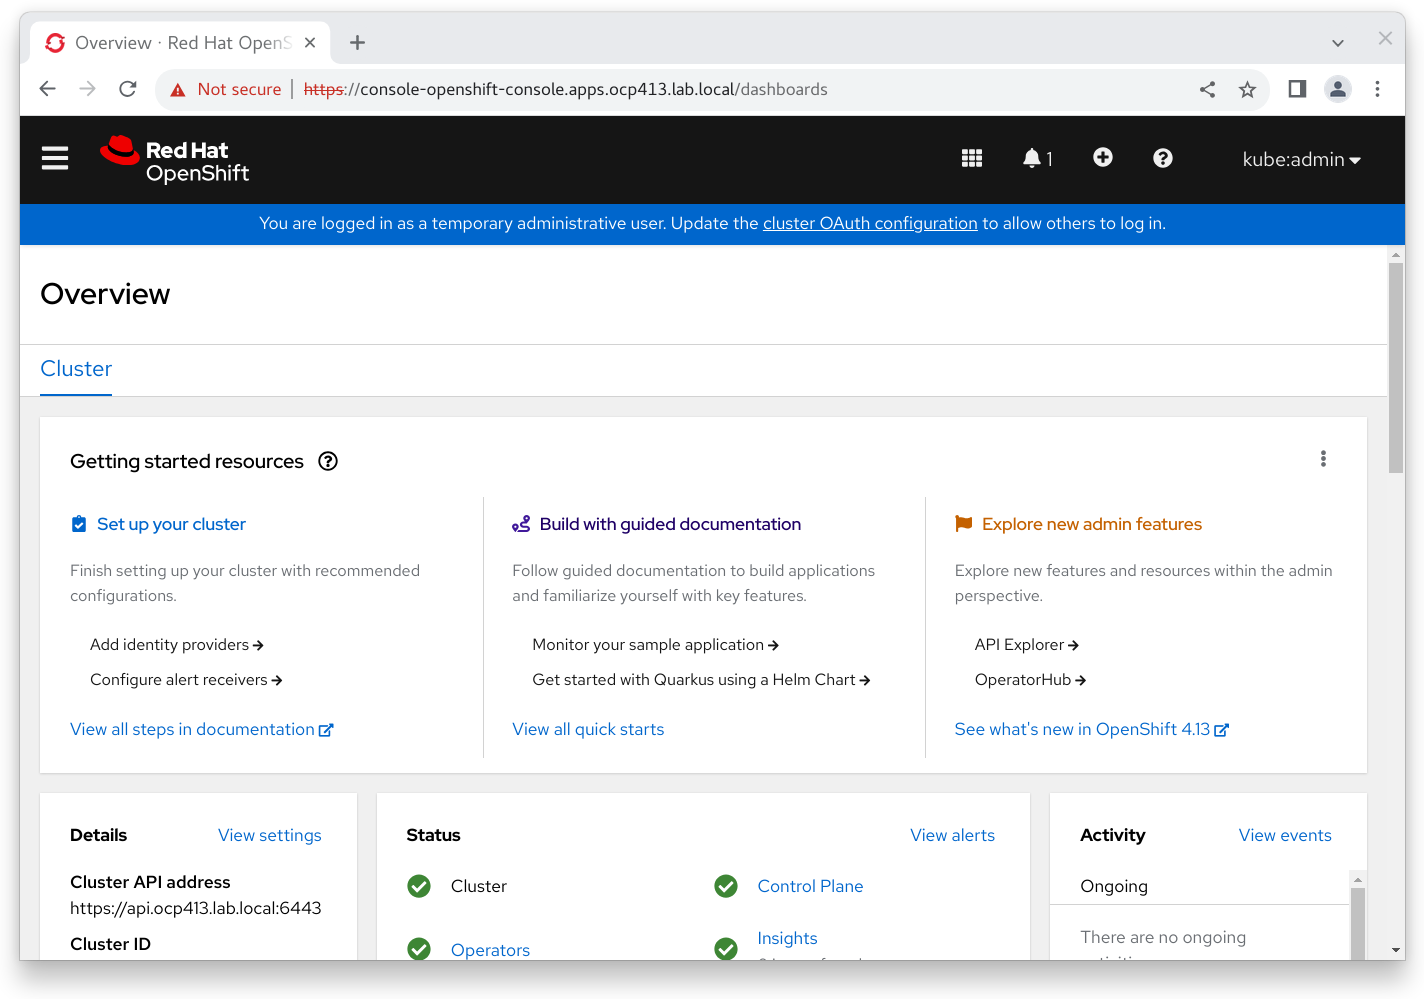
And logging in via https://console-openshift-console.apps.ocp413.lab.local/
Note: If the cluster is not installed on your workstation, it’s may be easier to install a browser on the server then forward X connections, rather than maintaining a local hosts file or modifying local DNS to catch and resolve local cluster queries:
ssh -X user@server
Success \o/
For detailed kcli documentation see: https://kcli.readthedocs.io/en/latest/
Following your guide and youtube video on creating a single node cluster, I am getting an error when running “kcli create”. See below:
Using installer version 4.15.14
Grabbing image rhcos-415.92.202402201450-0-openstack.x86_64.qcow2 from url https://rhcos.mirror.openshift.com/art/storage/prod/streams/4.15-9.2/builds/415.92.202402201450-0/x86_64/rhcos-415.92.202402201450-0-openstack.x86_64.qcow2.gz
Image rhcos-415.92.202402201450-0-openstack.x86_64.qcow2 not Added because Pool default not found
Pool default not found
Any ideas as to why this is happening? I’m running fedora server 40 and trying to install SNO 4.15.
hello, just need to create the pool first, as stated in the doc, with
kcli create pool -p /var/lib/libvirt/images default